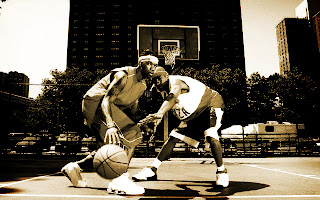
after

since i love basketball so much..
i've decided to choose this
ripped it of from corbis.com
it's copyrighted...
ok..shuk..here's the tutorial you've requested

here's to adjust the level abit
move it to the right side to bring out more black in the image

duplicate the background layer

select desaturate and the image adjustment

this is how it looks like when it's desaturated

create a new empty layer to put in the color
i've chosen this color
it's sorta brownish
makes really good sepia tone

select overlay for the layer's blend mode

change the opacity a little lower
for my case
i've chosen 60%

select a new adjustment layer - curves
curves are actually one of the best tool to create different look and feel for your images
but providing you need lotsa try and errors to get the best result

roughly
this is how your curves layer is gonna look like

create a new empty layer
then use the marquee tool to select a rectangle on the image
the rectangle must not be the entire part of the image
maybe like 20 pixels inner of it
then select the feather tool
i used 40 pixels, it's up to u...
this will create a nice curvy corner selection for u...
go to the next step

then select inverse
go to the next step

fill in the selection with black color
for that layer
use overlay for it's layer's blend mode
this is to add the vignett effect around the image...
mind my english..
this is the final touch

2 comments:
wah so freee one?? ;p hehe tq2
Wah! Damn complicated ler! no other way to make sephia mode meh? why must put another layer? the last part of putting another layer n fill in black i don't understand ler...
Post a Comment